Introducing React Paginating ???


There are some popular components which help us to solve pagination problem such as react-paginate, react-pager, … Now there is another one. It’s called react-paginating with a different approach.

How “react-paginating” is different
“react-paginating” uses Render Props pattern which allows a component to publish any variables, states or functions to the outside as input params of a function which is going to be used for handling logic and rendering the UI.
Here are some differences:
- Input props.
- Controlled props.
- Child callback functions.
- Flexible UI.
Input props
We minimize the number of props which you pass to “react-paginating” for some several reasons:
- Make code more readable.
- Easy to remember the props.
- Not taking too much time to read a document.
- Easy to use
Here is a list of input props:
total
The total records of your data. Your API should include it. I.e:
{
  "total": 50,
  "data": [
    { "id": 1, "name": "foo" },
    { "id": 2, "name": "bar" }
  ]
}
limit
How many pages you want to have based on a limit. The formula to calculate totalPages:
const totalPages = Math.ceil(total / limit);pageCount
How many pages you want to display.
I.e:
pageCount = 5
pageCount = 9

currentPage
The page currently you are visiting. You can pass it from your “query string” or “state”. You can visit the example here.
Controlled props
After receiving input props. The component calculates and publishes props which allow controlling UI. Here is a list of public props:
- pages
- currentPage
- previousPage
- nextPage
- totalPages
- hasNextPage
- hasPreviousPage
Here is how it looks like in code:
<Pagination total={total} limit={limit} pageCount={pageCount} currentPage={currentPage}>
  {({
    pages,
    currentPage,
    hasNextPage,
    hasPreviousPage,
    previousPage,
    nextPage,
    totalPages,
    getPageItemProps
  }) => (
    <div>
      <a href="/?page=1">first</a>

      {hasPreviousPage && <a href={`/?page=${previousPage}`}>{'<'}</a>}

      {pages.map(page => {
        return (
          <a
            key={page}
            style={currentPage === page ? { backgroundColor: '#fdce09' } : null}
            href={`/?page=${page}`}
          >
            {page}
          </a>
        );
      })}

      {hasNextPage && <a href={`/?page=${nextPage}`}>{'>'}</a>}

      <a href={`/?page=${totalPages}`}>last</a>
    </div>
  )}
</Pagination>
Child callback functions
If you use paging with state and has no update on your query string. You can use this callback function pass to your control.
{pages.map(page => {
  return (
    <button
      key={page}
      style={currentPage === page ? { backgroundColor: '#fdce09' } : null}
      {...getPageItemProps({
        pageValue: page,
        onPageChange: this.handlePageChange
      })}
    >
      {page}
    </button>
  );
})}
Flexible UI
By using Function as Child Components pattern. We can completely control UI component. Take a look:
{pages.map(page => {
  return (
    <a
      key={page}
      style={currentPage === page ? { backgroundColor: '#fdce09' } : null}
      href={`/?page=${page}`}
    >
      {page}
    </a>
  );
})}
native-anchor.js
import CustomAnchor from './component/CustomAnchor';

{pages.map(page => {
  return (
    <CustomAnchor
      key={page}
      style={currentPage === page ? { backgroundColor: '#fdce09' } : null}
      href={`/?page=${page}`}
    >
      {page}
    </CustomAnchor>
  );
})}
custom-anchor.js
In the example above shows that we can create <CustomAnchor /> component and then replace <a />. After that, you might put your <CustomAnchor /> somewhere on your “storybook” or components manager.
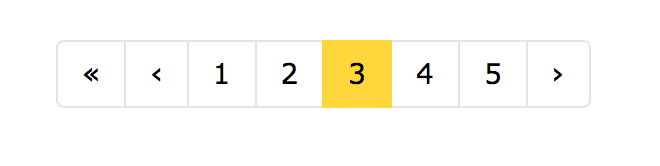
Demo
Conclusion
If you see it is useful for you. Please give react-paginating a star ?, a watch ?, and a try ?.
Or if you see any issues or improvements. PR is welcomed.
Thanks!